Wings As Eagles: November 2008

Thursday, November 27, 2008

Thanksgiving Day

We are spending this Thanksgiving weekend with Krissa in Alabama and are excited about spending time with her! :) I hope your Thanksgiving is wonderful as well!


Come, ye thankful people, come, raise the song of harvest home;
All is safely gathered in, ere the winter storms begin.
God our Maker doth provide for our wants to be supplied;
Come to God’s own temple, come, raise the song of harvest home.

All the world is God’s own field, fruit unto His praise to yield;
Wheat and tares together sown unto joy or sorrow grown.
First the blade and then the ear, then the full corn shall appear;
Lord of harvest, grant that we wholesome grain and pure may be.

For the Lord our God shall come, and shall take His harvest home;
From His field shall in that day all offenses purge away,
Giving angels charge at last in the fire the tares to cast;
But the fruitful ears to store in His garner evermore.

Even so, Lord, quickly come, bring Thy final harvest home;
Gather Thou Thy people in, free from sorrow, free from sin,
There, forever purified, in Thy garner to abide;
Come, with all Thine angels come, raise the glorious harvest home.

Thursday, November 20, 2008

Tackling this month: the bathroom part 3

Ok, today the plan was to finish and we did! And it looks so wonderful! More photos are here.

My foamboard to catch the extra paint from the sponge
was quite covered by the time I was finished!


If only there was a counter all around the bathroom - that
was the perfect height to stand on, paint and
be able to reach the whole wall as I did yesterday! :)


Quite fun! :)

Sponging an open wall is one thing, but the edges
are quite another! Just try to get paint clear up to the ceiling,
but not on the ceiling?! A challenge, for sure!


Where is a touch-up needed?

Finished! The "after"

Wonderfully nice!! :)

Just look at those cabinets?!?! So nice after what they looked like here!

The painting is done and difficult work is done. I've ordered blinds for the windows and need to pick up towels and rugs in the light sage green color and that will be done. Then I need to start hunting for fabric for a valance to put at the top of the window and a few things to put on the walls. But the majority is finished! Hip, hip, hooray! :)

Wednesday, November 19, 2008

Tackling this month: the bathroom part 2

More work on the bathroom today. Dad was able to get the bathroom painted off white. It's amazing what a couple coats of paint can do. Once that paint was on the walls, the bathroom just seemed so much larger.

Dad painting the walls


Skittles did not like the smell of fresh paint,
but as always, she want to be right where I am,
so she sat right outside the door, watching what
was going on inside. Do you see the woodwork
around the door and how it has yellowed over
35 years? Definitely in need of paint!

This morning, I started out with this color of paint. I kept sponging on paint, but in my mind, I knew that was not the color I wanted on the walls. While it matched the bathroom fixtures, it was not the gold I had in mind. Jena and Dad (yes, even Dad!) agreed, so after a quick trip to Dodge for different paint, I just painted up a storm of options!

Most certainly not THAT color!


Option A: yellow with gold overlay


Option B: yellow base with gold and green overlay


Option C: Perhaps just green??


Option D: I think this is the gold I had in mind! (Thanks, Jen!)


Option E: What about gold with slight touch of green?

Needless to say, I had lots of fun playing with paint on the walls before I finally decided what looked the best. Dad was just totally thrilled to paint over all the area of the walls where I played with paint (not!)! The only thing he told me was I couldn't make any mistakes because he was just about out of white paint. :)

My painting options on this wall...


...and on this wall...


...and on this wall.


Because of all the little areas in bathrooms,
painting it can be a challenge, but I got started and
made some great progress sponging on the gold - option D!


See how well the gold matches the mirror edging?! Perfect!

That's as far as I got today...the plan is to finish up everything as far as painting tomorrow and get the bathroom back in order.

Monday, November 17, 2008

Fruit of the Spirit: Self-Control


Memory Verse: Colossians 3:17
And whatever you do in word or deed, do all in the Name of the Lord Jesus, giving thanks to God the Father through Him.

Bible Lesson:
Fruit of Self-Control - Lemon

What does it mean?
Putting restraints on what we want, eat, buy or say. Having control over our desire. Showing restraint in your actions and speech.

How does Jesus show us an example?
Matthew 4:1-4, 5-7, 8-11 - Satan tempts Jesus to make stones into bread, fall off a temple roof and worship Satan. Jesus uses self-control by quoting Scripture and defeating Satan.

How can we show self-control?
Being careful what you say and what you do. Not doing too much of one thing, like in the food we eat, the things we buy with our money and the texting and email we do everyday. Think of ways you can show self-control this week.

I had each of the kids write down one thing they could do this week to show self-control on two dye cut lemons. Then they hung them one up in the tree on my sketch pad and the other one they took home to remind them to do it. Next week we will pick the lemons from the tree and see if they produced the fruit of self-control the previous week. (see first photo for lemon tree)

Tackling this month: the bathroom part 1

The last couple of years, the bathroom has been the room that's needed a little touch-up! Since Dad has been sprucing things up outside, I decided it's time to do a little sprucing up inside. So this month, we're planning a minor/major overhaul of our main upstairs bathroom.

It's minor because we're not changing any fixtures (I couldn't quite convince Dad to do that and I have to admit that's not a necessity!), but major because it's a bit more than the majority of the projects I plan every month. Plus it involves Dad doing most of the painting and the other work. I just plan what we're doing and I'll do the fine touch details after the painting is finished.

The gold/green/ivory striped wallpaper has been on those bathroom walls for 35 years - ever since Dad built our house. In reality, the paper has stayed really well without peeling off. The bathroom used to be in gold tones, but years ago Mom added a hunter green to the decor with the blinds and curtain top. But it's time for a total makeover!

the "before"

the "before"

The cabinets are the part that really need to be redone. The paint has really chipped and even a piece of the gold trim has fallen off.

the "before" cabinets

This is the other thing - these screw holes in the wall. When we were taking care of Mom at home, we had to put a handrail up in the bathroom, which I've wanted to take down. But when you take it off, you have to do something to repair the wallpaper.

torn wallpaper

Our plan is to paint the walls and cabinets an off white/ivory color which matches the whitish counter top color. Then I'm planning to sponge on some gold paint that matches the crackle in the counter top. I've been trying to think of how to incorporate another color into the room besides just neutral colors and all of a sudden it hit me!

During church Sunday, I was sitting there listening and glancing at the floral arrangements Roma from church had created for our 10th Church Anniversary last weekend. Of course! The color scheme was gold/ivory/light sage green/burgundy from last weekend. That green color - perfect!

So that's the color scheme - off white/gold/ light sage green and perhaps a dark sage green. I want to keep lighter colors since this bathroom is so small. The striped wallpaper even makes the room darker and smaller. Once the walls are finished with the off white and gold, I may do a little blotting of the green - it just depends on how it looks.

color scheme

Then I'll decide the color of blinds and what to do for a curtain top. I have an idea in my head, but I want to see how the walls turn out first. I've seen that wallpaper for so long, I can't imagine that room any different.

Dad started this afternoon by taking off the cabinet doors and taking out the drawers and started repairing/painting them. They already look so much better!

Dad painting cabinet drawers

I started pulling things out of the cabinets and cleaning before Dad was ready to paint those. Just look at everything I pulled out, plus there's another whole pile in the schoolroom! I thought we had gone through all the bottles of shampoo, mousse, air freshener, soap and hair supplies after Mom passed away since she used this bathroom for doing her hair, but apparently we need to go through it again and clear out some stuff!

stuff, stuff and more stuff!

Tomorrow begins another day of painting......right now I'm off to do some website coding for a few hours tonight!

Saturday, November 15, 2008

Sweet BBQ Chicken Kabobs

This is actually a summer grilling recipe, but I just couldn't resist cooking it one more time before winter sets in. For the last two weeks my mouth has been watering for this tender, flavorful chicken. And this time I added chopped red potatoes to the mix, which I thought turned out rather well.

Now if I could just figure out a way to get the grilling effect in the oven or on the stove top, that would be fantastic! I like cooking things out on the grill - love the looks and flavor, but it is so hard to cook evenly. Especially with the potatoes this time. You have to cook a little longer or slower to get the potatoes done and that is tricky if you don't want a burned kabob.

Plus, I don't think Dad trusts me with the grill. I always mention to him in the morning I'm going to use it for lunch, just to make sure it has gas and everything. And it never fails - he is ALWAYS in earlier for lunch, starting it and checking it every so often. I think that might have to do with the fact that one time I left the gas on or something....I can't recall exactly just what I did, but it was something I wasn't supposed to do. Oh, well, he's better at the grilling part than me, so I'll just let him do it! :)


Sweet BBQ Chicken Kabobs


Ingredients:

1 lb. boneless, skinless chicken breasts, cut into 1 1/2" chunks
2 cups 1 1/2" fresh pineapple chunks
1 each: red and green pepper, cut into 1 1/2" chunks
2 medium red potatoes, cut into 1 1/2" chunks
1/2 cup BBQ sauce
3 TBSP. frozen orange juice concentrate, thawed

Directions:

Slightly precook red potatoes before cutting into chunks. This will allow them to cook faster when on the grill. Soak wooden skewers in water 30 minutes before using to help prevent burning.

Using 8" long wooden skewers (2, side-by-side, for each kabob), alternately thread chicken, peppers, pineapple and potatoes. The two sticks together keep the chunks from turning as you are grilling.

Mix BBQ sauce and orange juice and brush onto kabobs.

Grill 8-10 minutes or until chicken is completely done, turning and brushing with sauce as needed.
colorful combination, isn't it?

all ready to go!
Tuesday, November 11, 2008

10th Anniversary Church Celebration

This past weekend was busy one - the 10th Anniversary of Grace Community Church! There were months of planning by many people into Saturday and Sunday. It's sad to see the months of planning over in just two days, but for those involved in all the planning, we are glad it went well and it is done and over with!

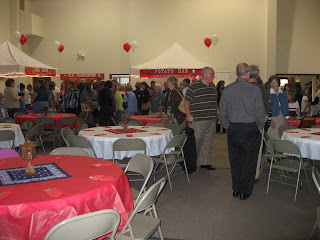
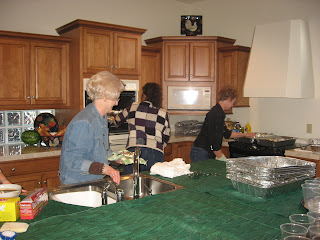
Saturday evening was, "A walk down memory lane..." with a foodcourt style meal consisting of the potato bar, GCC cafe and old fashioned ice cream floats. We were planning for 180 people to attend out evening get-together of a huge picnic - quite a bunch! Jena and I were part of the kitchen staff and laughed through the whole evening! We had a blast doing the "work" that was so much fun!

After we did some of the prep work in the kitchen, we were taking charge over the cafe stand handing out hamburgers, hot dogs and all the condiments that go with it! One of the best parts about our job is that we get to see and talk to everyone as they pass by.

After Saturday night, we tore down all the picnic decor and started putting up all the harvest decor for Sunday morning. It was a busy night, but went quickly since we had several people helping with all the tearing down and putting up. Plus all the funny moments just enhanced the evening!

A couple ladies at our church have a wonderful ability to design, decorate and organize! We were just so amazed at all the decorations they came up with and how they designed the entire weekend!

Here's some photos from the weekend...you can see more here.

part of the kitchen crew

grilling the hot dogs and hamburgers

chatting before the crowd arrives


our station - the GCC Cafe


The food is ready and so are we...now where is everyone?

Here they come!

Megan, me, Jena

We are now open for business!

not too difficult....

Don't forget about the ice cream floats!

the potato bar workers

all ready for Sunday!

Friday, November 7, 2008

Little mini cupcakes!

Last Sunday JoBeth in my Sunday School class had a birthday, so since I made cookies for Samantha a couple month's ago, I would be in huge trouble if I did not bring anything for her sister!

I decided on cupcakes this time - little mini ones. I used a chocolate cake mix with this recipe I love using! I've used this recipe several times with cakes, but never with cupcakes until now. And it does keep the cupcakes moist and yummy, preventing them from drying out.

mini chocolate cupcakes

After I froze the cupcakes to make them easier to frost, I whipped up this frosting recipe and frosted the cupcake tops with the white fluffy stuff.

fluffy white tops!

I mixed one bowl of white with some purple coloring and another with yellow coloring and that's where the fun begins...

purple petals!

I used the purple to make six little loops to create petals. The first few were a little lopsided, but the more I did the better they looked! I can't say that all were perfectly shaped loops, but close to it!

yellow swirls!

After the purple petals, came the yellow swirl. This served several purposes: (1) what flower doesn't have a center?, (2) it needed more color and (3) it covered up all the mistakes of joining the petals in the center.

They turned out wonderful and of course my Sunday School class enjoyed it! I also had lots of fun doing it as well!

Then I had some leftover cake batter and I wanted to try baking with Silicone. I've never had any Silicone bakeware and I'm not quite sure where I picked these little decorative pans up, but I poured my leftover batter into those and gave it a try.


I did some checking online whether I would need to spray the pans or sprinkle with flour and I pulled up various results. I wanted the baked cakes to pop right out of the pans without having to dig them out, so I sprayed two and sprayed and floured two. Both came right out after I let them cool for a while without an ounce of trouble. Next time I think I will try not using any non-stick and see what happens.

I also read that Silicone does not always bake evenly, but I did not have any trouble with that. They seemed to bake just as well as any metal pans. And it was much easier to just flip the cakes out of the pans than metal ones. Plus cleaning them was a breeze compared to metal pans. They puffed up a little but too much as you can see below, but I had a little too much batter and know I overfilled the pans a little. But at least they didn't overflow in my clean oven! :)